Ubuntu Review: The Open-Source Powerhouse Driving Digital Transformation

In the world of operating systems, Ubuntu stands as a beacon of innovation, flexibility, and security. Developed by Canonical Ltd. and first released in 2004, Ubuntu has grown into one of the most widely adopted Linux distributions. Its user-friendly design, open-source foundation, and enterprise-ready capabilities make it an excellent choice for businesses, developers, and technology enthusiasts alike.
This review explores what Ubuntu is, how it empowers businesses, and why it plays a pivotal role in the future of open-source technology.
What Is Ubuntu?
Ubuntu is a free and open-source operating system built on the Linux kernel. Designed to be intuitive and accessible, it caters to users of all technical levels—from beginners to seasoned IT professionals. Ubuntu is available in several versions:
- Ubuntu Desktop – for personal and workstation use
- Ubuntu Server – optimized for enterprise workloads
- Ubuntu Core – designed specifically for IoT and edge computing
Backed by a global community and Canonical’s commercial support, Ubuntu is known for its regular six-month releases and long-term support (LTS) versions, which offer five years of updates and stability—making it ideal for business environments.
What sets Ubuntu apart is its strong commitment to open-source values. It’s free to use, modify, and distribute, giving businesses freedom from costly proprietary licenses and vendor lock-in.
How Ubuntu Helps Businesses
1. Reduces IT Costs
Ubuntu is 100% free, offering a budget-friendly alternative to commercial operating systems like Windows or macOS. With no licensing fees and low hardware requirements, it enables businesses to:
- Extend the life of older hardware
- Avoid expensive vendor contracts
- Lower upfront and ongoing IT costs
Example: A startup can deploy Ubuntu on refurbished hardware to build a cost-effective yet secure network infrastructure.
2. Enhances Security
Security is at Ubuntu’s core. With built-in tools like AppArmor, UFW (Uncomplicated Firewall), and automatic security updates, it provides robust protection against threats.
Use Case: A financial services firm can deploy Ubuntu Server to host sensitive databases, ensuring strong, customizable access controls and real-time patching.
3. Empowers Cloud and Server Deployments
Ubuntu Server is a top choice for modern data centers and cloud deployments. It powers many cloud environments and integrates seamlessly with AWS, Microsoft Azure, and Google Cloud.
- Supports containerization (Docker, LXD)
- Scales easily across multi-node clusters
- Ideal for web hosting, SaaS, and microservices
Use Case: A SaaS provider can rapidly deploy cloud-native apps using Ubuntu with Kubernetes and OpenStack.
4. Supports Software Development and DevOps
Ubuntu is a developer-friendly OS with extensive support for:
- Python, Node.js, Java, Go, Rust, and more
- Git, CI/CD tools, and package managers
- IDEs like VS Code and JetBrains
Its compatibility with tools like Docker, Ansible, and Jenkins makes it a perfect base for modern development and DevOps pipelines.
Example: A development agency can use Ubuntu as a unified environment for coding, testing, and deploying applications.
5. Powers IoT and Edge Devices
Ubuntu Core, a minimal and containerized version of Ubuntu, is tailored for Internet of Things and edge computing scenarios. It offers:
- Secure, transactional updates
- Lightweight performance
- Remote device management
Example: A smart factory can use Ubuntu Core to manage IoT sensors and analytics hubs for real-time operational insights.
Ubuntu and the Future of Open-Source Technology
Ubuntu is not just a product—it represents a movement. Here’s how it’s shaping the future:
1. Democratizing Technology Access
Ubuntu ensures that powerful computing tools are available to all, regardless of budget or background. Its open-source nature removes financial and legal barriers, fostering innovation across industries and geographies.
2. Leading in Cloud and IoT Innovation
Ubuntu powers much of today’s cloud infrastructure and edge computing environments. It’s trusted by enterprises, startups, and governments for its scalability, flexibility, and performance.
Example: A healthcare organization can use Ubuntu to build HIPAA-compliant cloud platforms for telemedicine, ensuring secure and scalable digital services.
3. Championing Security and Transparency
With growing concerns around privacy and surveillance, Ubuntu’s transparent codebase and strong security posture give businesses confidence in the integrity of their infrastructure.
4. Enabling Global Collaboration
Ubuntu thrives on its community-driven development model. Thousands of contributors help test, improve, and document the system—ensuring it stays current, reliable, and inclusive.
Result: You’re not locked into a vendor—you’re part of a global movement.
Potential Challenges with Ubuntu
While Ubuntu offers immense value, it does come with considerations:
- Learning Curve: Users coming from Windows or macOS may need time to adjust.
- Training Requirements: Businesses may need to upskill staff or hire Linux-experienced professionals.
- Support Needs: While community support is strong, enterprise-grade assistance often requires a Canonical support plan.
Conclusion: Why Ubuntu Deserves a Place in Your Tech Stack
Ubuntu is a powerful, secure, and adaptable operating system that empowers businesses, developers, and individuals to build, scale, and innovate. Whether you’re deploying servers, developing apps, or managing IoT devices, Ubuntu provides the tools and freedom to thrive in a digital-first world.
Its open-source foundation, cost-effectiveness, and community-driven innovation make it much more than a Linux distribution—it’s a catalyst for progress.
If you’re looking for a future-proof, secure, and flexible platform, Ubuntu is a smart choice.
Install Ubuntu
Install Ubuntu Linux 22.04.2. The latest version is 24.04 and can be downloaded from their website https://ubuntu.com/download/server.
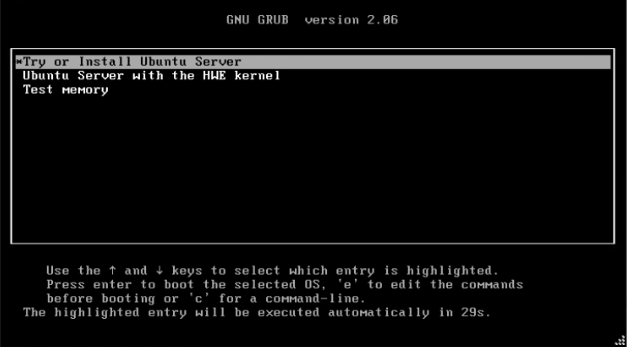
Insert your ISO be it on a Flash Drive or CD and start your system and then press Enter to *Try or Install Ubuntu Server.
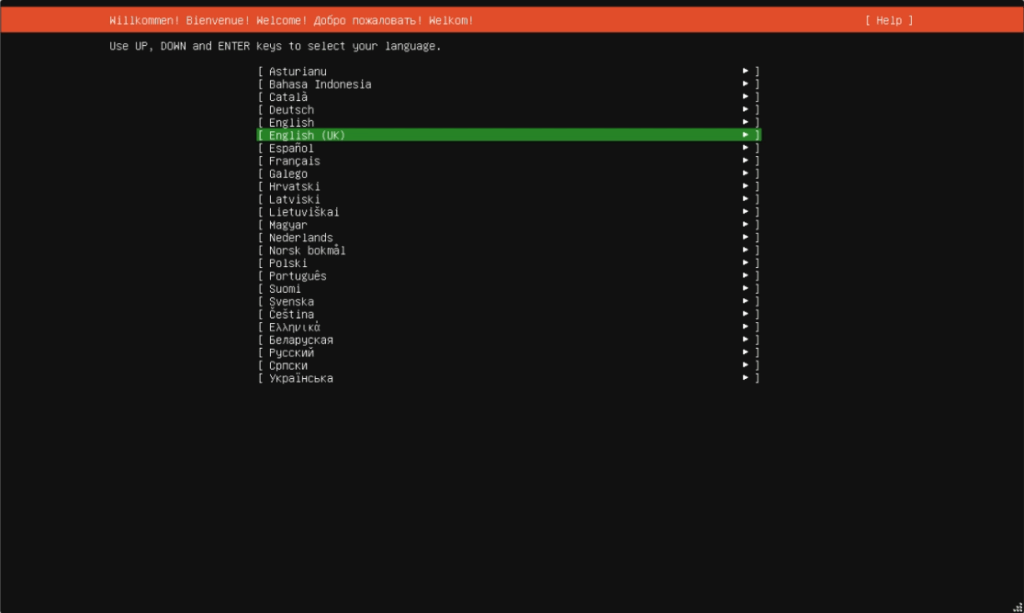
Select the language you desire and press Enter.
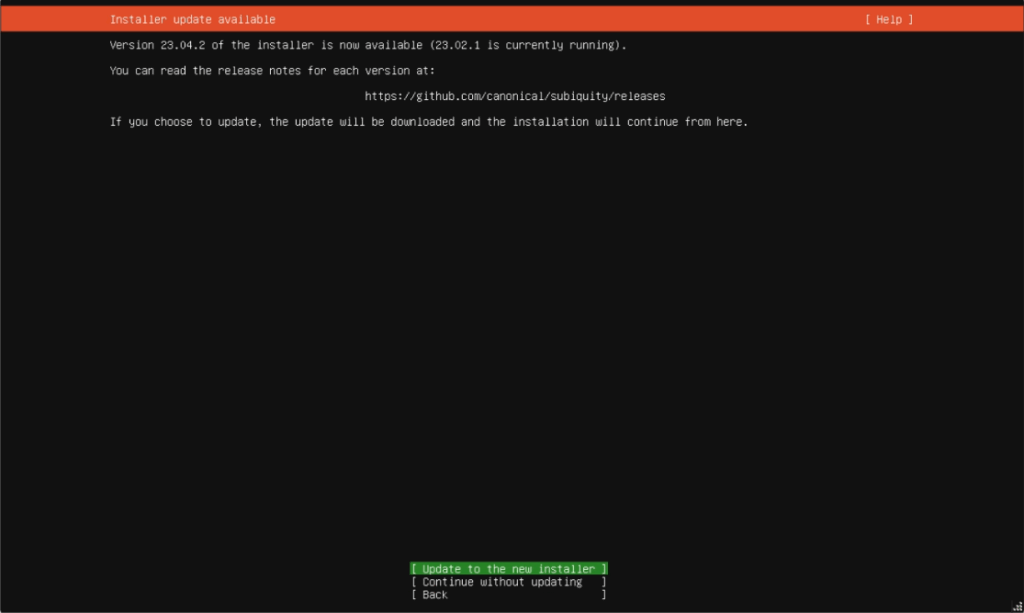
There is an updated version of the installer online and I recommend you update to the new installer.
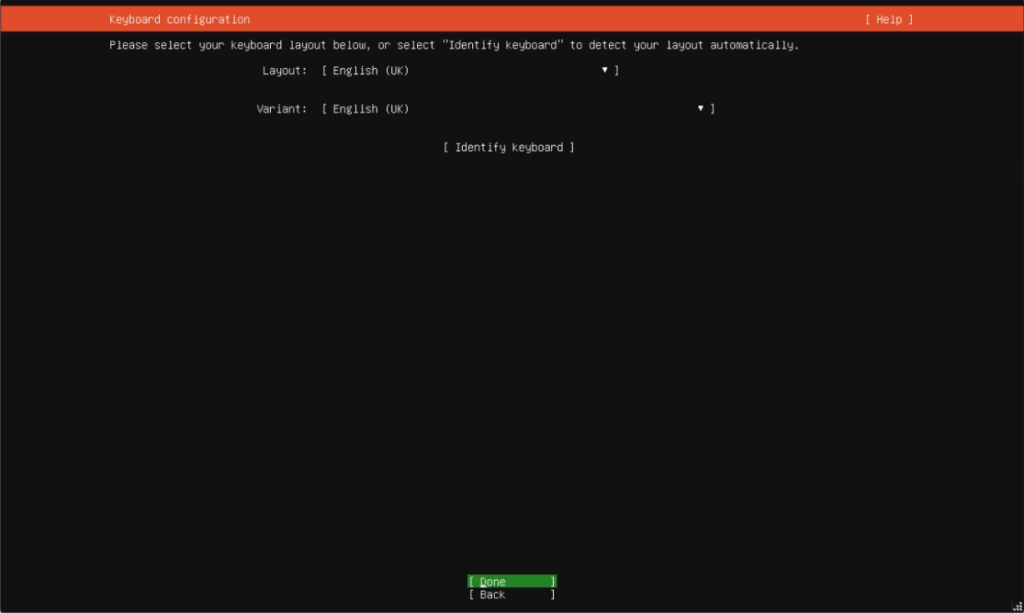
Once the Installer is updated it will ask which keyboard layout you require. Once selected arrow to Done and press Enter.
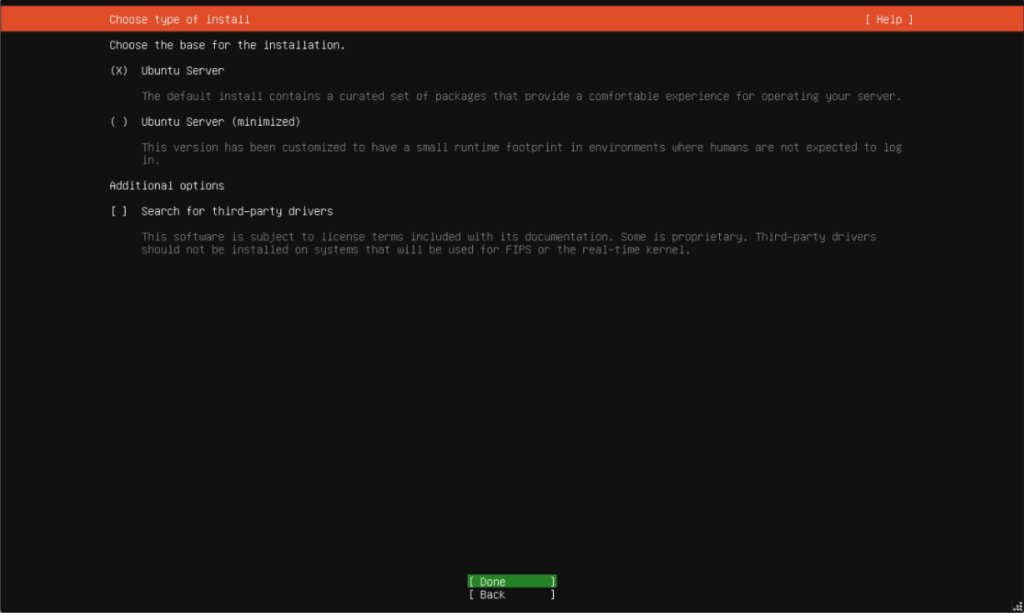
We just want the standard setup so make sure Ubuntu Server is selected and arrow to Done and press Enter.

Arrow up to your adapter as highlighted above (ens160) and press Enter.
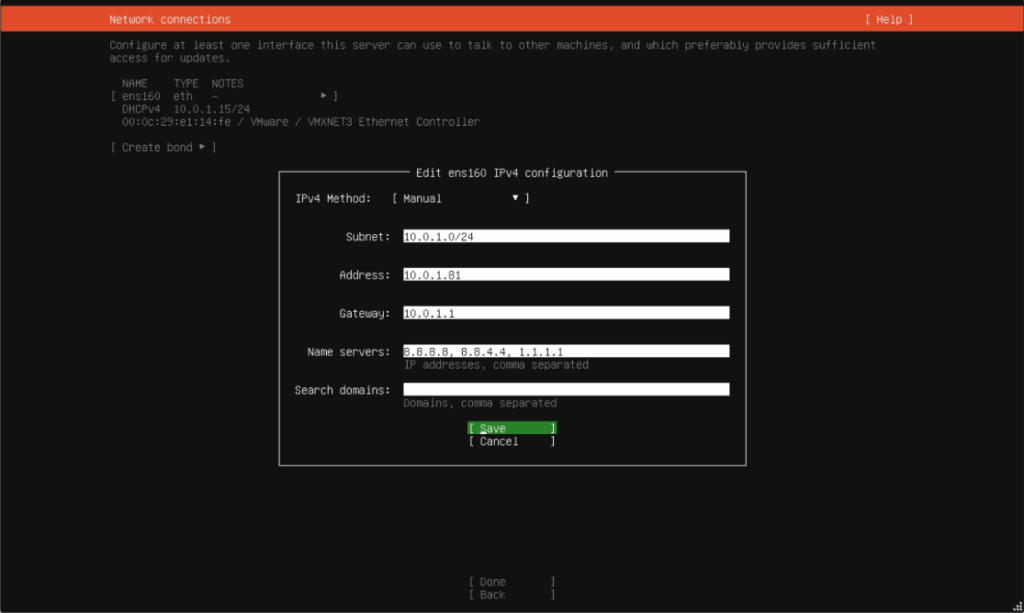
Fill out your required settings. If you are on a normal home router your settings are probably,
Subnet: 192.168.1.0/24
Address: 192.168.1.## Replace ## with a free location on your router. I used 81
Gateway: 192.168.1.1
When finished arrow to Save and press Enter. Network will reconfigure, then arrow down to Done and press Enter.
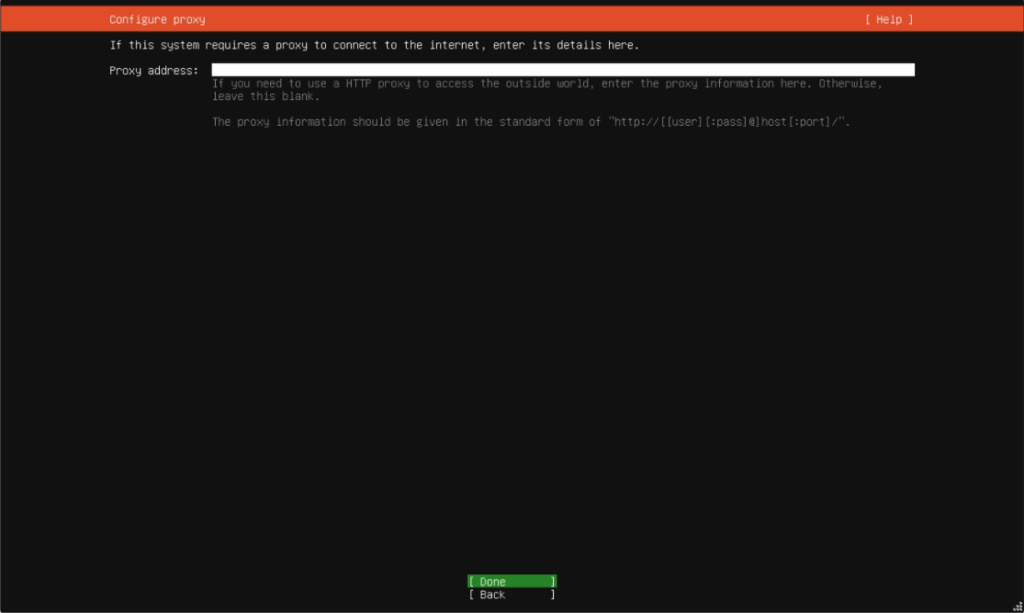
If you are behind a proxy enter it here. We are not so press Enter on Done.
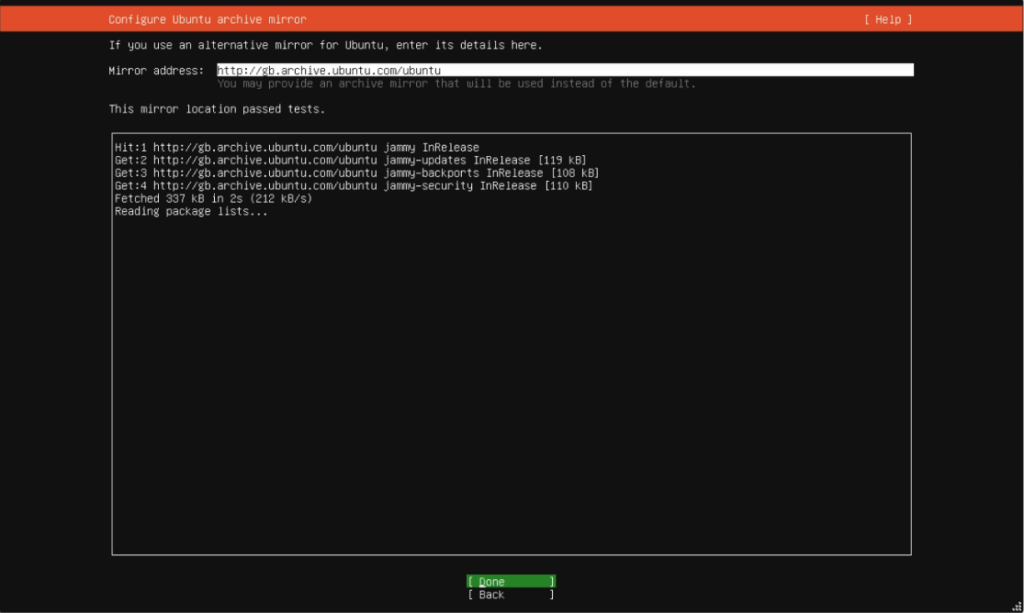
When it says “This mirror location passed tests.” you can press Enter on Done.
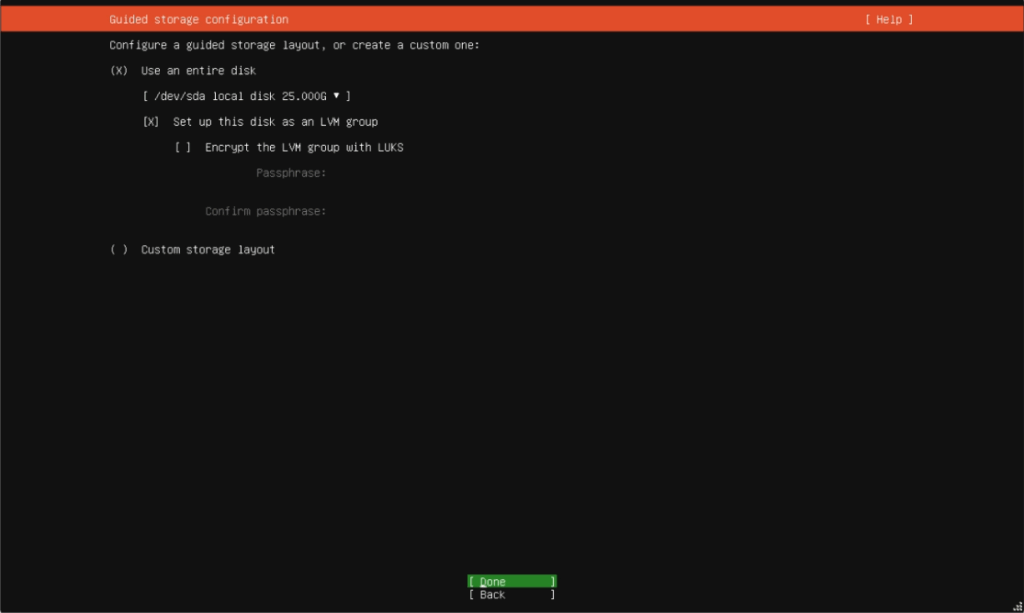
Here you can create partitions etc. We just want to use all of the disk as an LVM without Encryption.
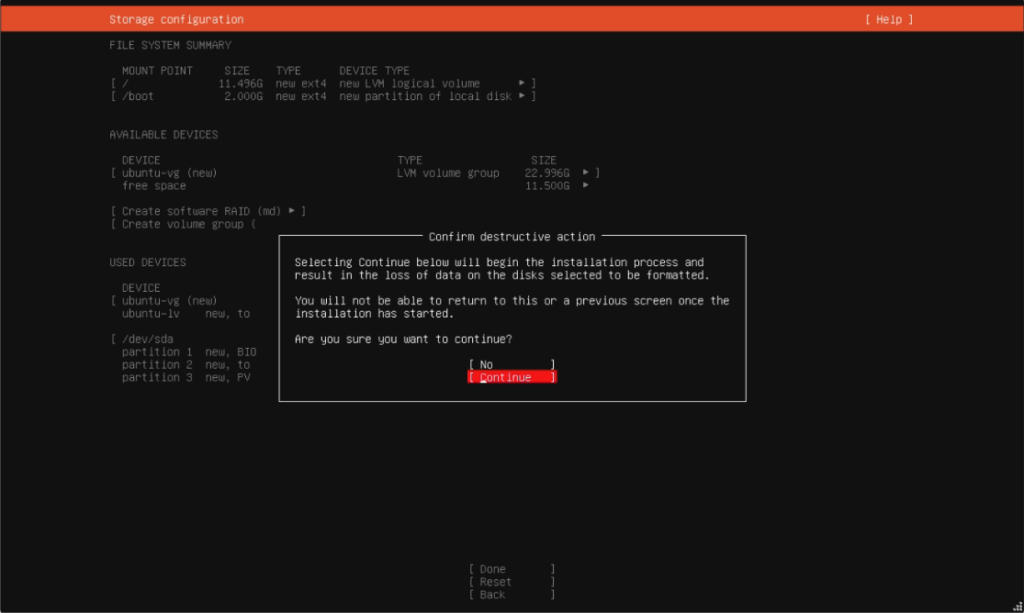
You will need to confirm to continue.
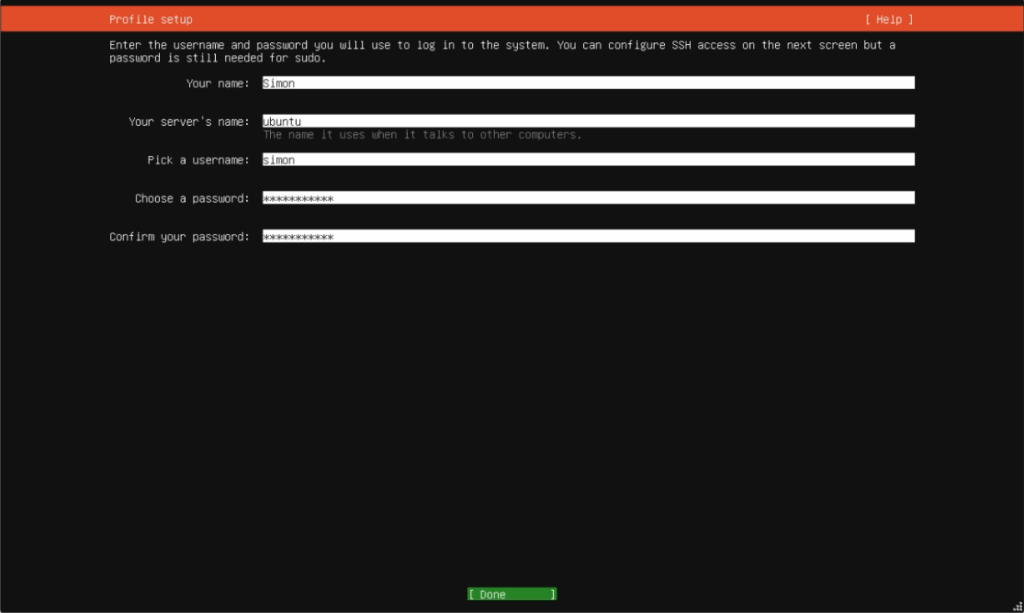
Setup username and password and give the server a name.
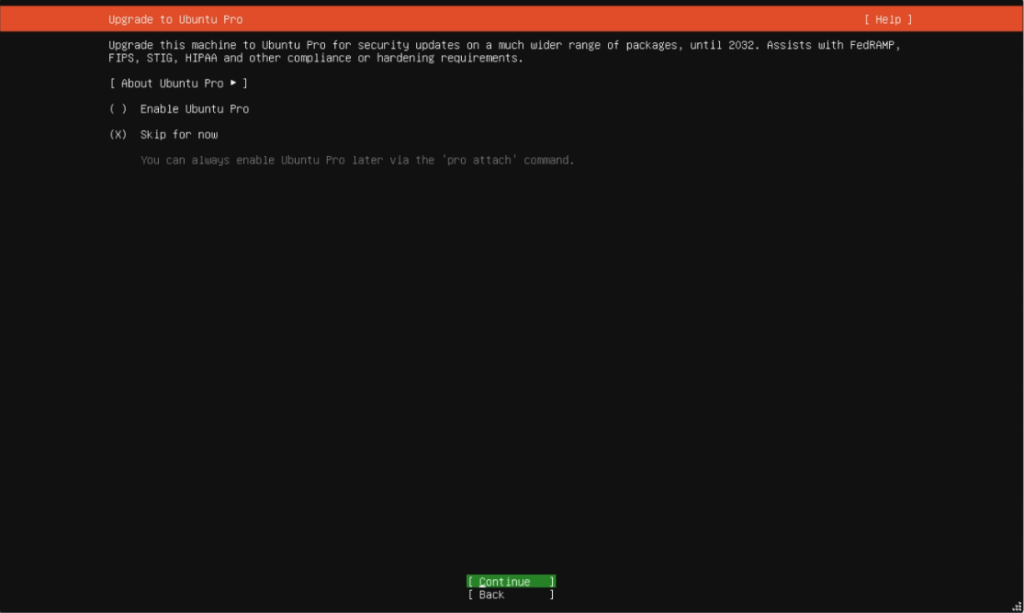
Skip Ubuntu Pro this can be setup later as you will need to register an account with https://ubuntu.com/pro/dashboard
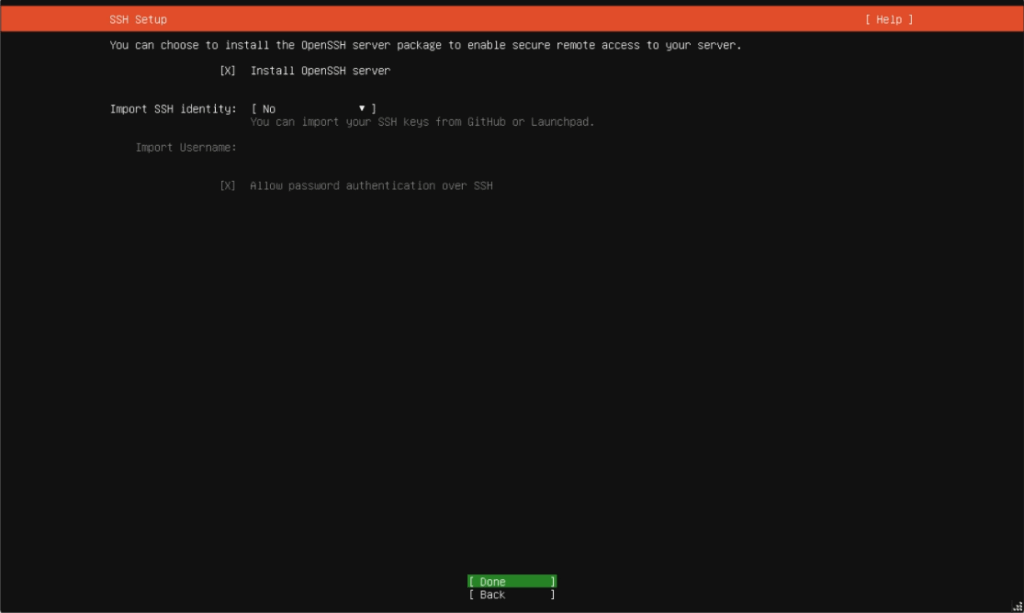
If you intend connecting to your server from another computer with say Putty you will need to install the OpenSSH server, arrow up to it and press Space-Bar to put an x next to it then back to Done and press Enter.

Don’t pre install any packages here as it is better to do it manually especially Nextcloud as it puts it in a SNAP container which has problems with SAMBA share. Arrow down to Done and press Enter.
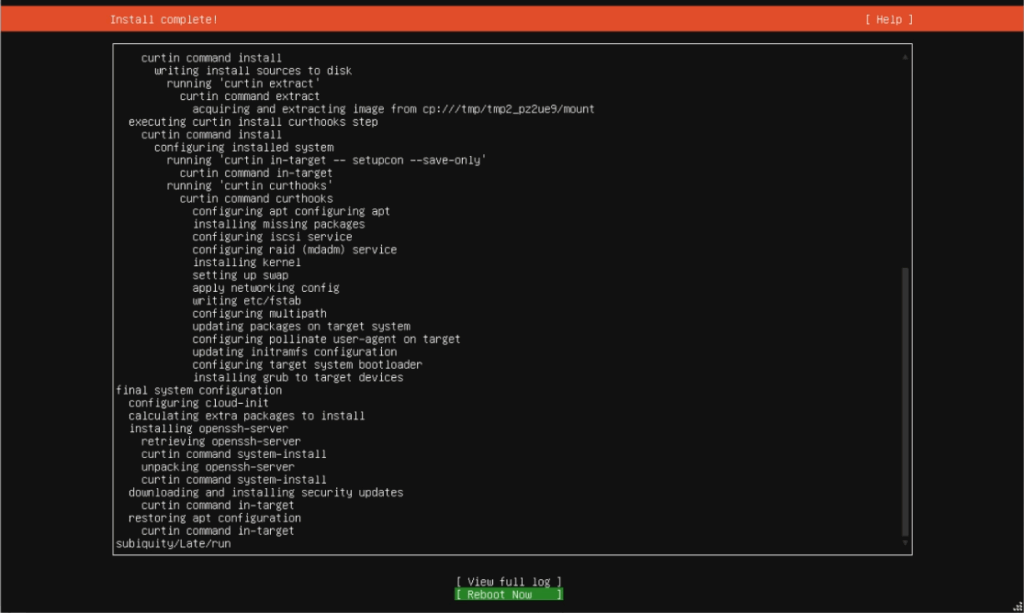
Once the installation finishes it will automatically start to download and install security updates, at this point the server can be rebooted and used but I recommend you leave it to install then reboot.
Remember to remove the installation media i.e. CD or Flash Drive.

If your installing on a virtual machine you may see this error if you don’t remove media, don’t worry just press Enter and it will continue to reboot.
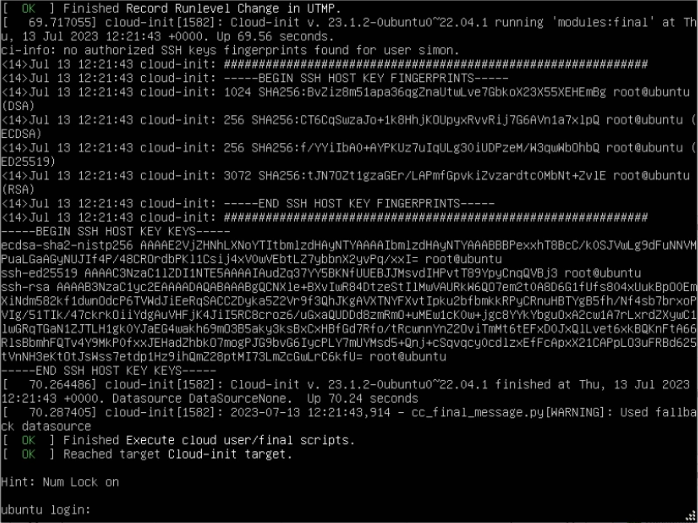
When the system reboots for the first time don’t log in straight away wait as system needs to install OpenSSH and some other scripts. When it says [OK] Finished Execute cloud user/final scripts. you can press Enter then log in.
Increase LVM
Here we will add two new hard drives to increase the LVM volume. This will be done on Ubuntu Linux current version is 22.04.02. The latest version can be downloaded from their website https://ubuntu.com/download/server. I have added two 450G hard drives to the system. Now I will show you how to add them to the system volume, the LVM. This volume is your main root volume where all the system files are and the /home directory is. The LMV is at peace as it will treat all the hard drives as one. I have SSH’d into the server so I need to open the SSH port before enabling the universal fire wall from fresh install.
# sudo ufw allow 22/tcp
# sudo ufw enable
Update server.
# sudo apt update && apt upgradeFind the new drive names and the volume group name and the logic volume name.
# sudo lsblkNAME MAJ:MIN RM SIZE RO TYPE MOUNTPOINTS
sda 8:0 0 20G 0 disk
├─sda1 8:1 0 1M 0 part
├─sda2 8:2 0 1.8G 0 part /boot
└─sda3 8:3 0 18.2G 0 part
└─ubuntu–vg-ubuntu–lv 253:0 0 10G 0 lvm / <—– we will be making this partition bigger sda3.
sdb 8:16 0 450G 0 disk <—– this is the drive name we are adding sdb
sdc 8:32 0 450G 0 disk <—– this is the drive name we are adding sdbc
sr0 11:0 1 1024M 0 rom
# sudo vgdisplay— Volume group —
VG Name ubuntu-vg
System ID
Format lvm2
Metadata Areas 1
Metadata Sequence No 2
VG Access read/write
VG Status resizable
MAX LV 0
Cur LV 1
Open LV 1
Max PV 0
Cur PV 1
Act PV 1
VG Size 18.22 GiB <—– note for later to see change
PE Size 4.00 MiB <—– note for later to see change
Total PE 4665
Alloc PE / Size 2560 / 10.00 GiB
Free PE / Size 2105 / 8.22 GiB
VG UUID q0gibL-enf0-PJ9E-Sefu-zeFw-8YjZ-64xLM8
# sudo lvdisplay— Logical volume —
LV Path /dev/ubuntu-vg/ubuntu-lv <—– needed for later when we lvextend and resize2fs
LV Name ubuntu-lv
VG Name ubuntu-vg <—– needed for later when we vgextend
LV UUID z2QI9z-ZbTo-vEY3-Fh6H-oEmy-d1ru-Yk95iI
LV Write Access read/write
LV Creation host, time ubuntu-server, 2023-06-15 22:50:26 +0000
LV Status available
# open 1
LV Size 10.00 GiB
Current LE 2560
Segments 1
Allocation inherit
Read ahead sectors auto
– currently set to 256
Block device 253:0
Convert your new disk to a physical volume (in this case, the new disk is ‘sdb‘ and ‘sdc‘).
# sudo pvcreate /dev/sdb
# sudo pvcreate /dev/sdc
Add the physical volume to the volume group via ‘vgextend’.
# sudo vgextend ubuntu-vg /dev/sdb
# sudo vgextend ubuntu-vg /dev/sdc
Allocate the physical volume to a logical volume (extend the volume size by your new disk size).
# sudo lvextend -l +100%FREE /dev/ubuntu-vg/ubuntu-lvResize the file system on the logical volume so it uses the additional space.
# sudo resize2fs /dev/ubuntu-vg/ubuntu-lvCheck all space was allocated and new configuration.
# sudo df -h
# sudo vgdisplay
# sudo lsblk
NAME MAJ:MIN RM SIZE RO TYPE MOUNTPOINTS
# sudo lsblk output.
sda 8:0 0 20G 0 disk
├─sda1 8:1 0 1M 0 part
├─sda2 8:2 0 1.8G 0 part /boot
└─sda3 8:3 0 18.2G 0 part
└─ubuntu–vg-ubuntu–lv 253:0 0 918.2G 0 lvm / <—– you can see the increase in storage space to sda3
sdb 8:16 0 450G 0 disk
└─ubuntu–vg-ubuntu–lv 253:0 0 918.2G 0 lvm / <—– now part of the LVM
sdc 8:32 0 450G 0 disk
└─ubuntu–vg-ubuntu–lv 253:0 0 918.2G 0 lvm / <—– now part of the LVM
sr0 11:0 1 1024M 0 rom
Add Storage
Here we will add a new hard drive for independent storage and mount it to the system this could be used for samba share. This will be done on Ubuntu Linux current version is 22.04.02. The latest version can be downloaded from their website https://ubuntu.com/download/server. I have added a 450G hard disk to the system. Now we will create a partition and mount it to a directory on the system. We will also add the disk to fstab so it will auto mount on restart. I have SSH’d into the server so I need to open the SSH port before enabling the universal fire wall from fresh install.
# sudo ufw allow 22/tcp
# sudo ufw enable
Update server.
# sudo apt update && apt upgradeFind the new drive names and the volume group name and the logic volume name.
# sudo lsblkNAME MAJ:MIN RM SIZE RO TYPE MOUNTPOINTS
sda 8:0 0 20G 0 disk
├─sda1 8:1 0 1M 0 part
├─sda2 8:2 0 1.8G 0 part /boot
└─sda3 8:3 0 18.2G 0 part
└─ubuntu–vg-ubuntu–lv 253:0 0 918.2G 0 lvm /
sdb 8:16 0 450G 0 disk
└─ubuntu–vg-ubuntu–lv 253:0 0 918.2G 0 lvm /
sdc 8:32 0 450G 0 disk
└─ubuntu–vg-ubuntu–lv 253:0 0 918.2G 0 lvm /
sdd 8:48 0 450G 0 disk <—– this is the disk name we are adding sdd
sr0 11:0 1 1024M 0 rom
Create partition on /dev/sdd.
# sudo fdisk /dev/sdd
	: g     <----- convert to GPT
	: n     <----- new partition follow prompts
	: w     <----- write to system
Check new partition. There should now be a sdd1
# sudo lsblk -p /dev/sddFormat new partition.
# sudo mkfs -t ext4 /dev/sdd1Create directory to mount the new partition. I will use share and place it in /mnt the mount folder for more permanent storage.
# sudo mkdir /mnt/shareMount new partition.
# sudo mount /dev/sdd1 /mnt/shareCheck mounted ok. You should now be able to see /mnt/share
# sudo lsblkNAME MAJ:MIN RM SIZE RO TYPE MOUNTPOINTS
sda 8:0 0 20G 0 disk
├─sda1 8:1 0 1M 0 part
├─sda2 8:2 0 1.8G 0 part /boot
└─sda3 8:3 0 18.2G 0 part
└─ubuntu–vg-ubuntu–lv 253:0 0 918.2G 0 lvm /
sdb 8:16 0 450G 0 disk
└─ubuntu–vg-ubuntu–lv 253:0 0 918.2G 0 lvm /
sdc 8:32 0 450G 0 disk
└─ubuntu–vg-ubuntu–lv 253:0 0 918.2G 0 lvm /
sdd 8:48 0 450G 0 disk
└─sdd1 8:49 0 450G 0 part /mnt/share <—– can now see it’s mounted at /mnt/share
sr0 11:0 1 1024M 0 rom
Mount permanently on restart etc. First find the unique id UUID.
# sudo blkid/dev/mapper/ubuntu–vg-ubuntu–lv: UUID=”8ce6d827-b178-4f7f-a0a5-7a0e2aed665f” BLOCK_SIZE=”4096″ TYPE=”ext4″
/dev/sda2: UUID=”dfa8d1be-fb11-4571-96a2-3491e24c8d25″ BLOCK_SIZE=”4096″ TYPE=”ext4″ PARTUUID=”2f5376d6-9338-4390-8616-55dcb4b82f5d”
/dev/sda3: UUID=”6rOmjN-pAIs-K4cz-SxMI-oRCZ-MxWV-dbLkbH” TYPE=”LVM2_member” PARTUUID=”10be40e3-8830-471b-ab6c-1e21f96053e0″
/dev/loop1: TYPE=”squashfs”
/dev/sdd1: UUID=”4e07bf22-7a7d-4d15-b77a-070ef94730c1” BLOCK_SIZE=”4096″ TYPE=”ext4″ PARTUUID=”dd5f86b1-6b34-c64d-8569-265785a9f6f7″ <—–
/dev/sdb: UUID=”UNDV94-RVD5-QofK-JKpG-PniZ-wvMh-YlqLT0″ TYPE=”LVM2_member”
/dev/loop6: TYPE=”squashfs”
/dev/loop4: TYPE=”squashfs”
/dev/loop2: TYPE=”squashfs”
/dev/loop0: TYPE=”squashfs”
/dev/sdc: UUID=”zkuQSz-9pA6-ixq2-f0dq-Tj85-z3kU-rdUFvC” TYPE=”LVM2_member”
/dev/sda1: PARTUUID=”e8f2519d-d1fa-4926-a29a-a0e82369bb05″
/dev/loop5: TYPE=”squashfs”
/dev/loop3: TYPE=”squashfs”
# sudo vi /etc/fstabAdd following line.
UUID=4e07bf22-7a7d-4d15-b77a-070ef94730c1 /mnt/share/ ext4 defaults 0 0Check by forcing mount now.
# sudo mount -a